

Planning a Mechanical Room for a Charlotte Custom Home
By Max Built
9 min read
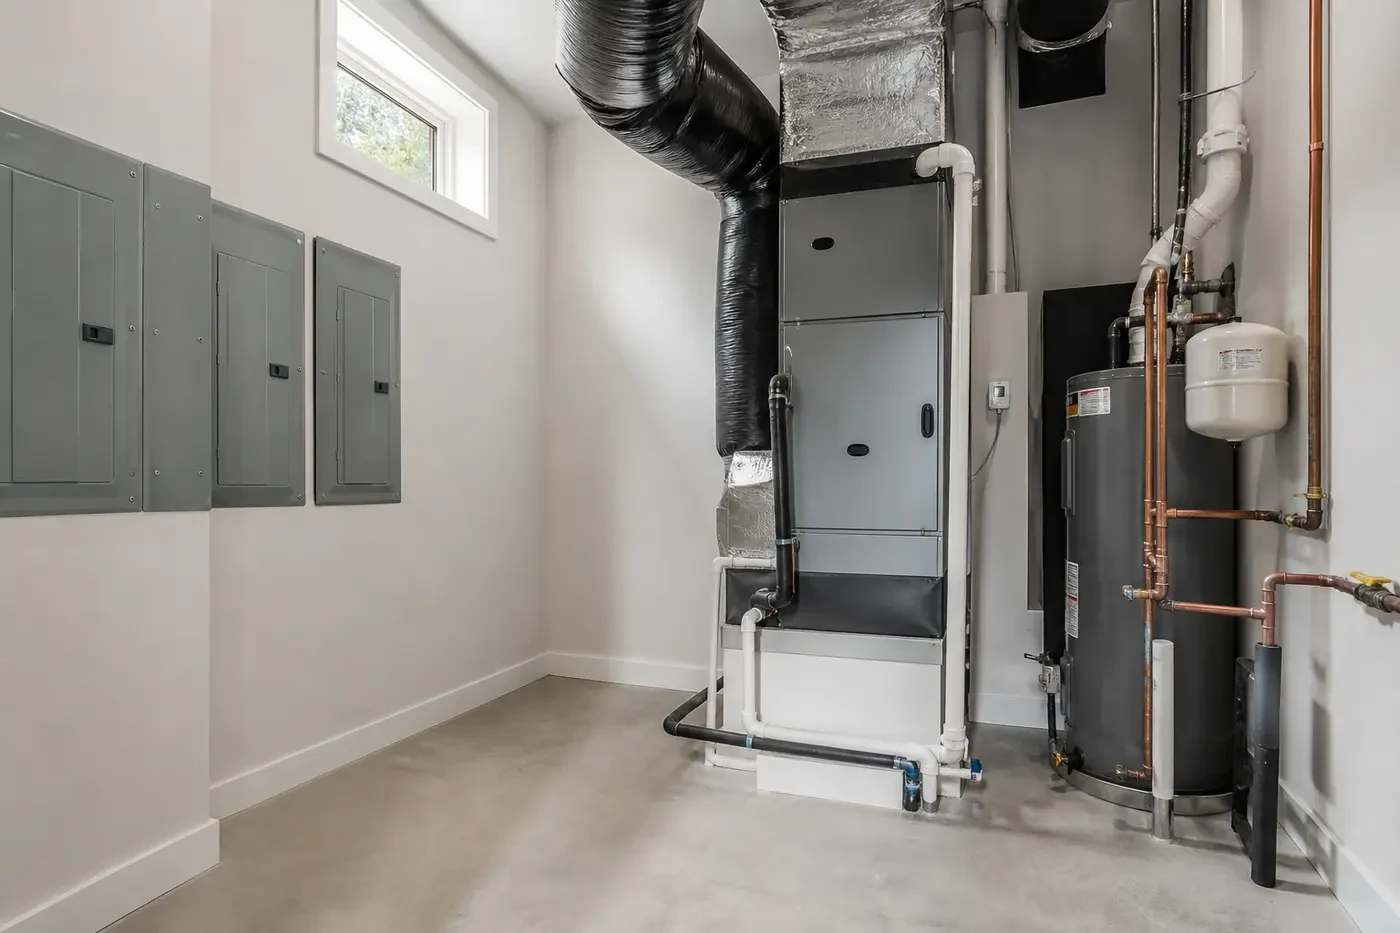
Plan a mechanical room for a Charlotte custom home while the floor plan, structure, and major system routes can still change. Start with an equipment schedule, then draw every unit at its actual service size—not just its cabinet footprint. Protect a clear route from an exterior or generous interior opening so major equipment can be replaced without removing finished walls. Coordinate ventilation, combustion requirements where applicable, drainage, leak protection, electrical clearances, sound control, lighting, storage boundaries, and access to filters, valves, panels, and controls. A good mechanical room is not leftover space. It is a deliberate residential service zone that lets the home's systems operate, be inspected, and eventually be replaced without disrupting the rooms around it.
Planning a new home? Explore Max Built's custom-home process, then view the craftsmanship in our project portfolio.
1. Build the equipment list before sizing the room
Begin with the systems the new home is expected to use. Heating and cooling equipment, water heating, electrical panels, low-voltage controls, water treatment, pumps, ventilation equipment, and other project-specific components all need real locations. The final list will develop with the design team, but reserving space early is far better than hoping everything fits after the floor plan is settled.
Ask for representative dimensions and required access zones, not only a row of generic rectangles. Doors open. Filters slide out. Panels need clear working space. Pipes, ducts, drains, wiring, platforms, and supports consume room around the cabinets. Two pieces of equipment that fit on plan may still be impossible to service when their access sides face one another.
Separate central equipment from items that belong closer to the rooms they serve. One enormous utility room is not automatically efficient. Shorter, organized routes and a few well-chosen service locations may support the house better, provided each location remains safe, accessible, and coordinated.
- Which systems and controls need a dedicated residential service location?
- Where are the service panels, filters, valves, drains, and shutoffs?
- Which equipment dimensions are preliminary, and which are selected?
- What must remain reachable without moving stored household items?
2. Draw operating and service clearances at full size
Show the complete working zone around every component. A technician may need to remove a panel, pull a filter, test a connection, reach a valve, or replace a part while adjacent equipment stays in place. These actions need floor area, light, and a safe approach. A narrow strip of unused space on a plan is not the same as workable clearance.
Check the room in section as well as plan. Duct trunks, piping, cable trays, lights, beams, and ceiling access can compete above the equipment. Keep shutoffs and controls visible rather than burying them behind ducts. Where equipment sits on a platform, confirm the platform, edge protection when needed, access, drain routing, and the way replacement parts will move through the room.
Then rehearse ordinary maintenance. Open every access panel and door on the drawing. Trace the path to each filter, drain, valve, panel, and control. If one task requires disconnecting unrelated equipment or crawling over pipework, adjust the arrangement before framing begins.
3. Protect a realistic replacement path
Mechanical equipment will not last forever, even in a carefully built home. Plan how the largest component can enter and leave. Measure the door opening, hall width, turns, stairs, ceiling height, thresholds, and any nearby built-ins. A wide room does little good when the route to it includes one tight corner.
Whenever practical, place the room near a straightforward service approach without turning an important living area into a delivery route. A direct exterior or garage-adjacent path may work on some plans; another home may use a broad secondary corridor. The right solution depends on the site and layout, but the path should be drawn and tested—not assumed.
Keep permanent pipes, rails, shelves, and trim from narrowing that route later. Document the clear opening and turning zones so finish work does not quietly consume them. Future replacement is easier when the original design leaves one understandable way in and out.
4. Plan for water, drainage, and early warning
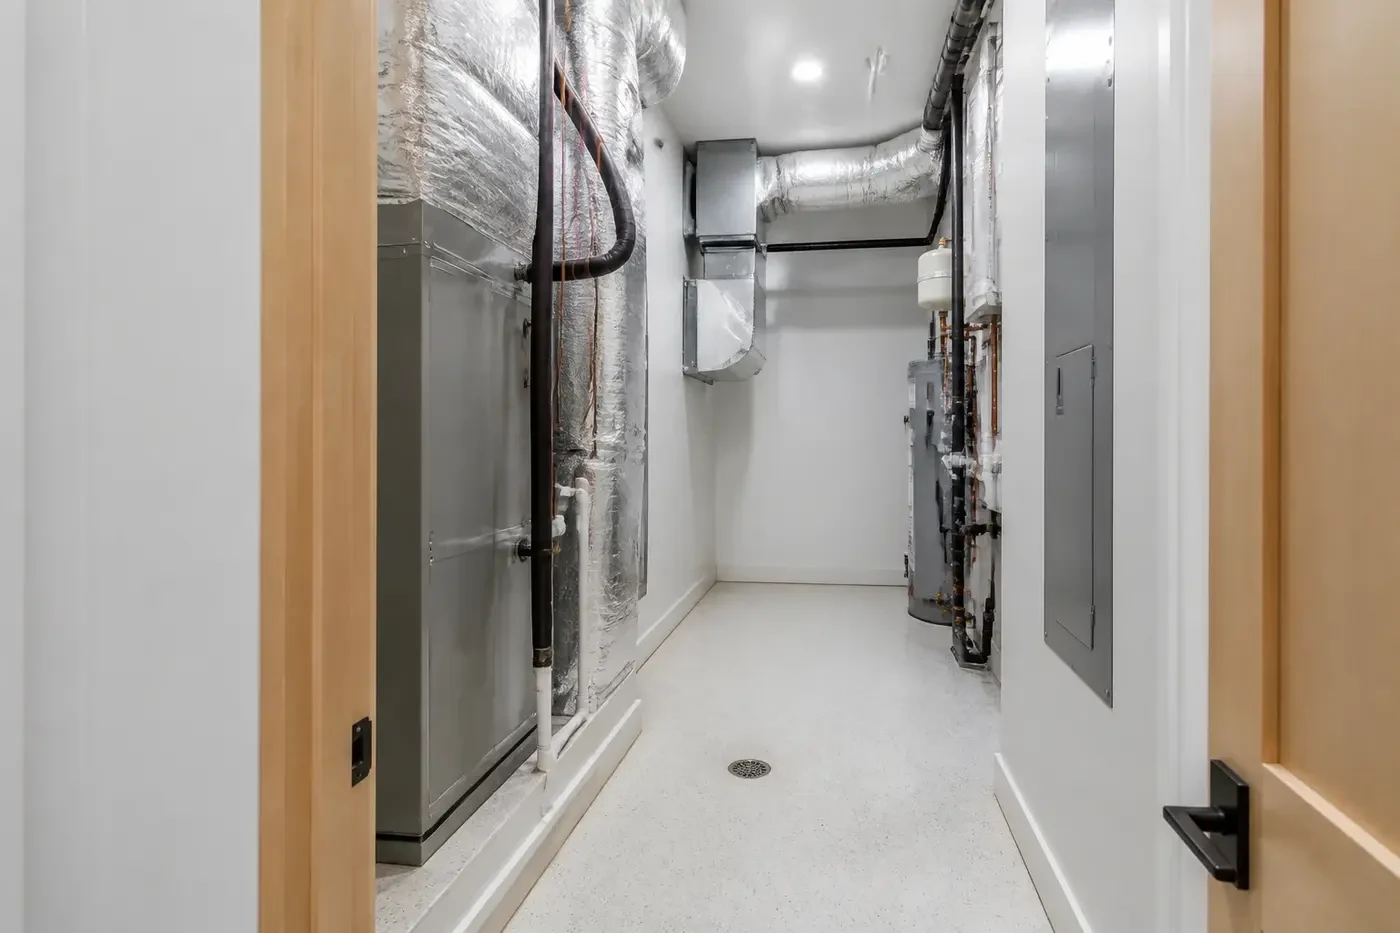
Any room containing water equipment, condensate, drains, or pressurized piping deserves a visible water strategy. Coordinate the floor surface, curbs or pans where selected, drains, condensate routing, shutoffs, and leak detection with the project team. Follow each route to a suitable termination instead of letting pipes disappear into a drawing note.
Place main shutoffs where a homeowner can reach and identify them without moving boxes or stepping behind equipment. Group labels and controls logically. If an automatic shutoff or monitoring system is selected, plan its power, sensors, valves, connectivity, and service access during construction rather than adding scattered devices later.
Review what sits beside, above, and below the room. A small water event becomes more disruptive when it reaches finished cabinetry, a primary living space, or sensitive equipment. Thoughtful location, durable finishes, drainage, detection, and clear shutoffs work together; no single feature replaces the others.
5. Coordinate ducts, pipes, wiring, and structure
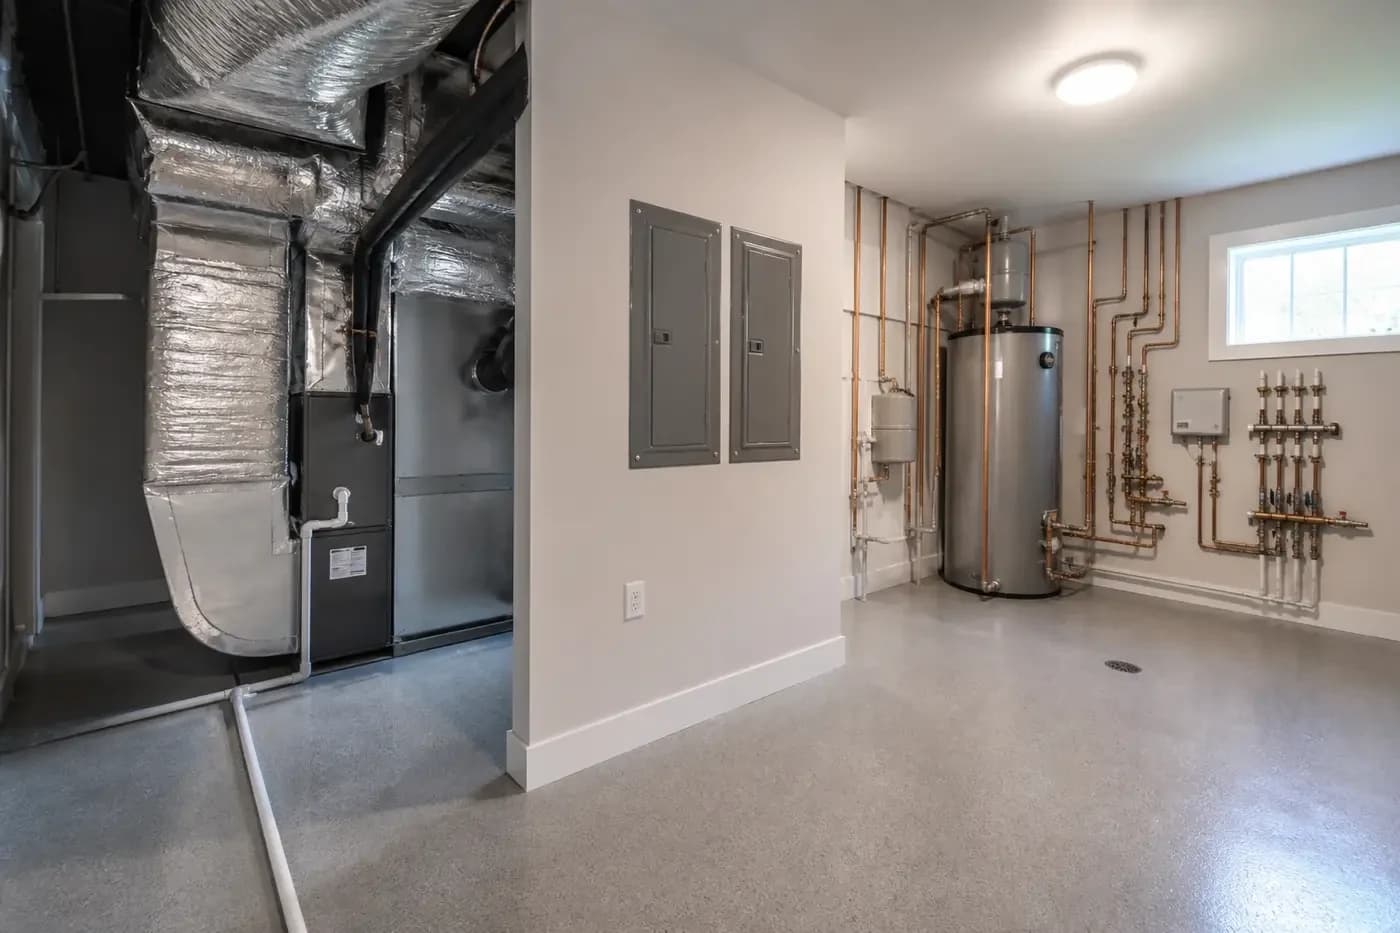
The mechanical room is where several drawing sets meet. Structural beams, floor framing, ducts, plumbing, gas piping if used, electrical feeders, controls, ventilation, drains, and access panels all compete for space. Overlay the routes before construction so one system does not block another system's service panel or force a string of awkward offsets.
Organize horizontal and vertical zones. Main ducts may need the clearest upper route, while drains depend on slope and electrical equipment needs protected working space. Keep piping and wiring supported, readable, and accessible. A neat room is not just visual polish—it helps someone understand which system they are looking at and where it goes.
Use building sections through the room and adjacent floors. They reveal beam conflicts, ceiling congestion, platform heights, chases, and penetrations that a floor plan cannot. Coordinate sleeves and openings before concrete or framing is complete rather than cutting a path after the fact.
6. Control sound, air, heat, and room boundaries
Equipment makes sound and may produce heat. Study the mechanical room's relationship to bedrooms, quiet sitting areas, and other sound-sensitive spaces before assigning it to leftover floor area. Wall and ceiling assemblies, door construction, vibration isolation, equipment selection, and route placement all influence what the household hears.
The room also needs the air and ventilation appropriate to the selected equipment. Requirements vary with the systems and fuel sources used, so coordinate openings, combustion air where applicable, exhaust, transfer air, and temperature limits with qualified project professionals and manufacturer information. Do not seal the room for sound and accidentally interfere with how equipment must operate.
Set a firm boundary for storage. Household supplies should not block panels, vents, drains, controls, or service paths. If storage is genuinely needed nearby, give it a separate, measured zone with suitable shelving rather than letting the mechanical room become the place where every leftover item lands.
7. Review the room before framing and rough-ins
Before the foundation, framing, and main rough-ins are fixed, review one coordinated equipment plan, ceiling plan, and building section. Confirm every unit, door, access panel, service clearance, replacement route, platform, drain, shutoff, panel, control, light, receptacle, duct, pipe, wire route, structural element, and penetration.
Walk the route at full scale where practical. Mark the equipment cabinets and working zones on a floor, carry a box representing the largest removable component, and turn through the proposed doorway. Stand where a filter or panel must be removed. This simple rehearsal often finds a pinch point that a clean diagram hides.
Finally, leave the room understandable. Provide bright working light, durable surfaces, clear identification, and an unobstructed floor. The best mechanical room may never appear in a home's formal photographs, but it supports every comfortable room around it. Planning that invisible work early is part of building the new home well.
Mechanical-room planning for a Charlotte custom home
When should a mechanical room be planned for a custom home?
Plan it during schematic floor-plan and system design, before structure, main duct and pipe routes, door openings, and equipment locations are fixed. Exact models may be selected later, but realistic space and access should be reserved early.
How large should a custom-home mechanical room be?
Size it from the selected or representative equipment, required working clearances, open access panels, ducts, pipes, drains, electrical space, and the route needed for future replacement. There is no useful one-size answer apart from the actual coordinated layout.
Can a mechanical room be used for storage?
Only within a separate planned zone that does not obstruct equipment, panels, vents, controls, drains, shutoffs, service clearances, or the replacement path. Unplanned household storage can quickly make routine access difficult.
What water-protection details belong in a mechanical room?
Discuss durable floors, equipment pans or curbs where appropriate, drains and condensate routes, accessible shutoffs, leak detection, automatic shutoff options, and protection of nearby finished spaces with the project team.
What should be checked before mechanical-room framing begins?
Confirm the equipment schedule, room and door dimensions, service and electrical clearances, replacement path, structure, ducts, piping, wiring, ventilation, drainage, shutoffs, controls, lighting, platforms, penetrations, sound assemblies, and storage boundaries on coordinated drawings.
Build the right plan before construction begins
Tell us about your property, priorities, and the way you want to live. We'll help organize the next decisions around a clear, buildable path.